 Offsite links

Metropolis Light Transport
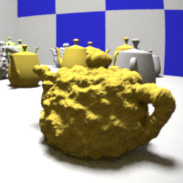
 I've recently been experimenting with Light simulation. More specifically, the application of Metropolis sampling to the problem. I have implemented the Metropolis Light Transport algorithm and all of the mutation strategies as described by Veach and Guibas in their 1996 paper. The original paper has been described as a "nightmare" and "very difficult" by numerous people in the field, which is why I decided to go with it rather than the simpler algorithms that have since come along.
In addition to extending the original to an efficient full spectral colour representation, I've implemented a number of other features, including a physically accurate camera model, a physically accurate spectral skylight model, dispersion, and thin-film interference.
Aside from triangles, I've also implemented a number of parametric surfaces, including rational Bezier patches and NURBS. A geometry cache has also been implemented which allows for fast, low memory displacement mapping.
I'm sorry there aren't more renders, I'll get around to it eventually
Path Sampling
 I've implemented Metropolis sampling as described by Veach et al. using bi-directional path tracing as the initial sampling algorithm. One nice thing about Metropolis algorithms is that they aren't tied to one particular means of drawing sample from a distribution. During the course of writing this renderer, I tried both forward, backwards, and bidirectional sampling methods. The addition of Metropolis sampling to any of them drastically increased their efficiency. However, I found that by far the most efficient base sampling method was bi-directional sampling. Although I haven't done any scientific tests, the switch from backwards path tracing to bi-directional path tracing seems to result in an order of magnitude less noise in certain scenes.
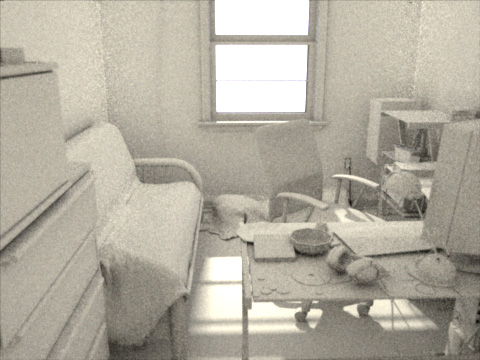
Bi-directional sampling is not without its problems though. One is that there is no elegant method of sampling hemisphere lights. With backwards path tracing, when you hit the hemisphere, you just stop tracing and proceed with integration. You could do this with bi-directional path tracing, but you'd be throwing away the half of your path that originated from a light source. Not the most efficient way of doing things. On the other hand, you could start your light-path directly on the hemisphere, but this would be rather inefficient in certain, unfortunately common scenes. Consider light from the sky entering through a window, bouncing off the floor and illuminating the ceiling. This works, but it can take quite some time for a path that originated on the sky to pass through the window, which may be comparatively tiny depending on how big the scene it.
Another problem with bi-directional sampling occurs when your scene has one very, very bright light and very many dim lights which are only significant in small areas. A sunny day with fifty candles under a rock would be a good example. The area illuminated by the candles would get sampled too well, and the areas illuminated by the sun would be under sampled. Weighting the probability of sampling lights based upon their brightness has problems too, like if you've got fifty streetlights that don't affect the scene very much and a single candle that affects it tremendously.
Geometry
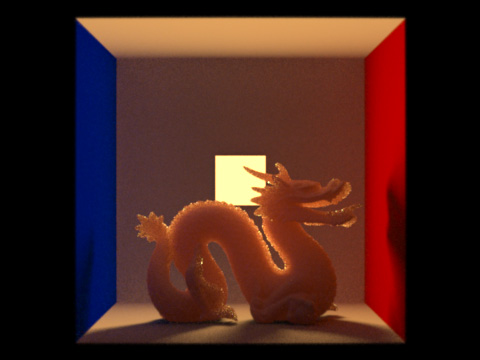
 The geometry cache is actually something I had written a few years ago. The geometry pipeline is very similar to that used by the REYES rendering algorithm (as used in Pixar's Photorealistic Renderman). Geometry is first split into smaller pieces, either of the same geometry type or another. NURBS, for example are split into rational Bezier surfaces to simplify triangulation. Geometry is recursively split based upon its projected size on the film plane (although this can be problematic when the object in question is out of focus, thus obscuring its true size) until all objects are below some preset size. After they've been split, all object's bounding boxes are inserted into the global KD-Tree. Splitting occurs before rendering begins.
During rendering, if a ray passes through an object's bounding box, the cache is checked to see if the object associated with the box is currently triangulated. If an object isn't currently in the cache, it is triangulated and old entries in the cache are deleted to make room. The size of the triangles is currently based upon the projected screen size, although this isn't an optimal solution. The vertices of the triangles are stored in grid structure, and a two level hierarchical bounding box structure is built to speed ray/triangle intersection tests. After the object has been tested against the ray, it is inserted into the geometry cache. If the cache is full, the N least recently used triangle grids are removed until there is enough room to fit the new grid.
Spectral Colour
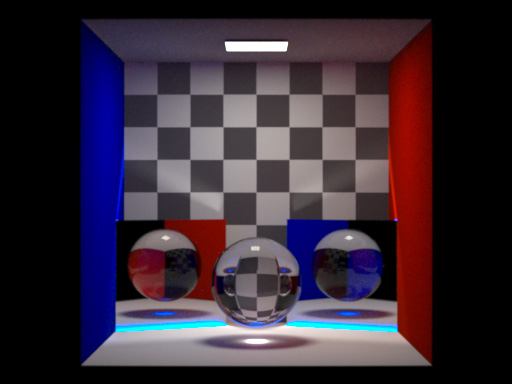
 If physical accuracy is desired, a simple RBG colour model is not sufficient. This renderer uses an 84 point spectral representation of color stretching from near infrared to near ultra-violet. Path integration suffers when calculations on such a large number of colour components are required, so some method of cutting them down is desirable. The simple solution is to trace every ray as though it were only composed of a single, random wavelength. The amount of extra noise this adds is immense, so a better method must be used. This renderer samples twelve wavelengths per ray that are renormalized so that their total power is equal to the light that is emitted them. When a dispersive material is encountered, rather than spawning twelve new rays, it simply drops into the one-ray-per-wavelength mode.
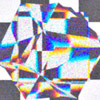
Aside from dispersion, spectal colour can also be used to simulate other interesting phenomenon such as thin film interference. Dichroic filters and anti-reflective coatings can be accurately simulated, along with more banal things like soap bubbles.
Spectral Skylight
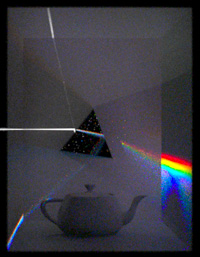
 This feature is actually rather broken at the moment. It's visible to camera rays, but not to indirect rays. I keep meaning to get it working again, but just haven't found the time. The picture shown was rendered with a very early, very buggy version of the renderer. I've only implemented the skylight section of the paper, not the aerial perspective bit. I want to implement the 1955 CIE overcast model and a physically correct night sky model as well.
This renderer has the beginning of support for polarization (semi-implemented, doesn't work), so I would eventually like to extent the daylight model to include the natural polarization present in the sky. Polarization would add even more complexity to what is already a stupifyingly complex pipeline, so I'm unsure if I'll ever go through with it. Support could add a lot of functionality though. Especially to the camera model, which could then simulate polarizing filters.
In addition to physical models, the renderer is free to use a simple texture over the sky dome.
Physical Camera and "Film"
 The camera model attempts to simulate a real camera as closely as possible. All of the settings you would find on a real camera are present. Focus, shutter speed, f-stop, and film ISO rating. Only spherical and planar lens elements are supported current, although aspherical elements would be simple to add.
There's also a very simple filter system. Right now it's limited to simple colour filters, but I've got plans to implement a filter micro geometry system that can be used to simulate soft-focus, diffusion, and cheesy special effects filters.